好的!我帮你把这份《SageAttention 2.2 安装思路》整理成一篇完整、易读、适合发文章的格式,并预留好插图位置:
🚀 SageAttention 2.2 安装指南(Windows / 虚拟环境)
✅ 本文提供了一套 完整的 SageAttention 2.2 安装步骤,适用于 Windows,并支持 conda / venv 等虚拟环境。
在开始之前,请先进入你已经创建好的虚拟环境。
💡 如果你遇到 torch 版本冲突 或 依赖不兼容,文中也有处理建议。
🌟 步骤 1:激活虚拟环境
首先,进入你准备好的虚拟环境。
如果你用的是 conda,执行:
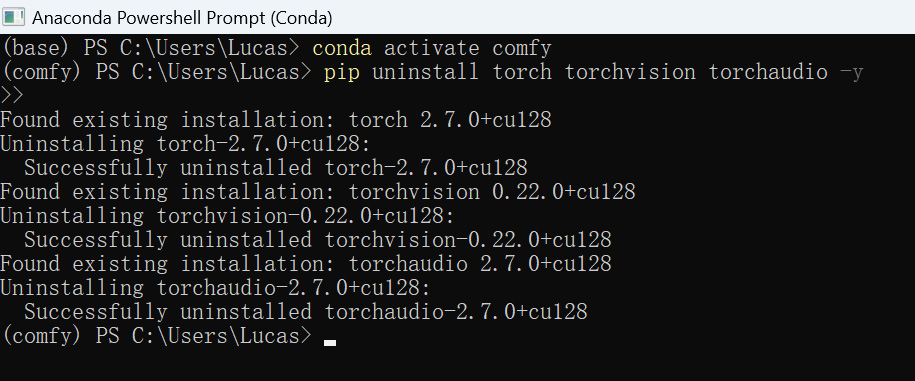
conda activate comfy
如果你用的是 venv,执行:
.\venv\Scripts\activate
📷 这里可以放一张虚拟环境命令提示符截图
🌟 步骤 2:卸载旧的 PyTorch 相关包
确保虚拟环境里干干净净,没有残留的旧版本:
pip uninstall torch torchvision torchaudio -y
pip uninstall torch torchvision torchaudio -y
🔷 提示:有时需要卸两次,确保完全删除干净。
📷

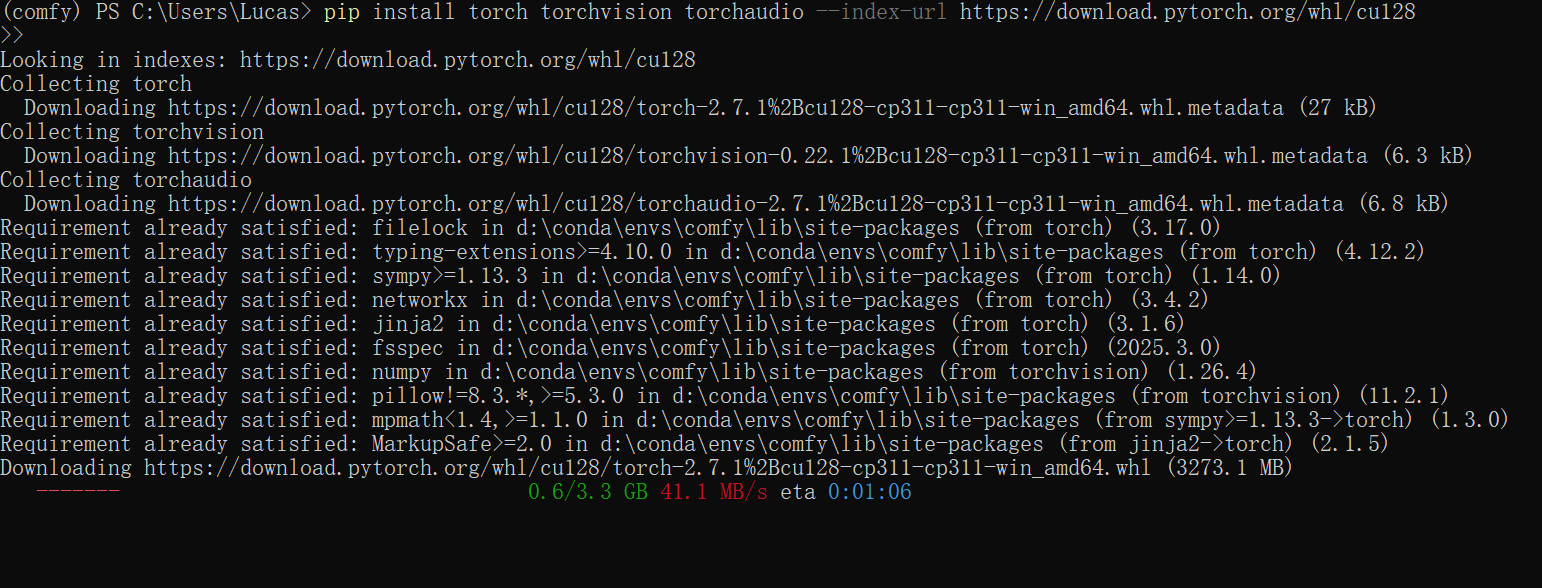
🌟 步骤 3:安装指定版本的 CUDA 12.8 PyTorch
运行官方源的安装命令:
pip install torch torchvision torchaudio --index-url https://download.pytorch.org/whl/cu128
安装完成后,检查 PyTorch 是否安装正确:
python -c "import torch; print(torch.__version__)"
你应该能看到类似这样的输出:
2.7.1+cu128
📷 
🔷 遇到依赖报错怎么办?
有时安装 SageAttention 时会提示类似错误:
ERROR: Could not resolve dependencies:
torch requires torch==1.12.1+cu128 but you have torch 1.12.1+cu128 which is incompatible.
此时,可以先卸载 xformers 再重装(并且不安装它的依赖):
pip uninstall xformers
pip install xformers --no-deps
📷 
🌟 步骤 4:安装本地 .whl 文件
接下来安装你本地下载好的两个 .whl 文件。
先安装 triton:
pip install D:\Python_Package\triton\triton-3.2.0-cp311-cp311-win_amd64.whl
再安装 sageattention:
pip install D:\Python_Package\sageattention\sageattention-2.2.0+cu128torch2.7.1-cp311-cp311-win_amd64.whl
📷 这里可以放一张安装本地 whl 文件的命令截图
🌟 步骤 5:检查安装是否成功
最后,测试是否能正常导入:
python -c "import torch; import triton; import sageattention; print('All OK!')"如果输出 All OK! 且没有报错,说明安装完成 ✅
📷 
📌 小结
虚拟环境隔离很重要,请确保在虚拟环境中操作;
先卸载干净,再安装 CUDA 对应版本的 PyTorch;
遇到依赖冲突不要慌,可以用
--no-deps安装;.whl文件路径要正确。
🎉 至此,你已经成功安装 SageAttention 2.2 !
参考资料
xformers 0.0.31
https://pypi.org/project/xformers/0.0.31/#files
AI-windows-whl
https://github.com/wildminder/AI-windows-whl
Install PyTorch
https://pytorch.org/
v3.2.0-windows.post10
https://github.com/woct0rdho/triton-windows/releases/tag/v3.2.0-windows.post10
